
Introduction
We will setup a Fleet Server for the Elasticsearch Stack v8.x.
This is a continuation of the Stand Alone Elastic Agent Tutorial and Elastic Agent Windows Integration.
Requirements
A running instance of Elasticsearch and Kibana. Instruction found here: Install Elasticsearch and Kibana
An Ubuntu server to be used as the Fleet Server.
An Ubuntu server to be used for Nginx Web Server.
Steps
Step 1 - Configure Fleet Server Output Settings [02:00]
Before we can install fleet server, we need to instruct Elasticsearch and Kibana of settings the Fleet Sever will use.
Go to Kibana.
Go to Menu.
Go to Fleet.
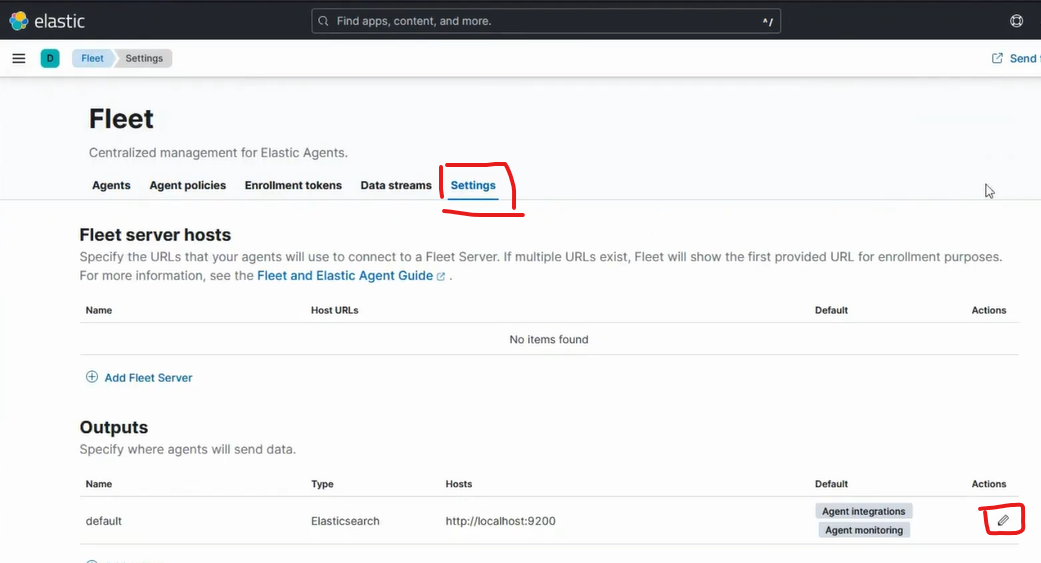
Go to Settings.
Go to Outputs.
Press on Pencil Icon in the Actions column.
Choose Elasticsearch for Type.
Fill out the Hosts with your actual Elasticsearch url, in our case it was https://elastic.evermight.net:9200.
If you are using publicly signed certificates, you do not need to reference the Certificate Authority. If you are using self-signed certificates, then paste in your Certificate Authority into the Advance YAML configuration field like this:
ssl.certificate_authorities:
  -----BEGIN CERTIFICATE-----
  MIEIfM.....
  ...etc...
  ...etc...
  ...etc...
  -----END CERTIFICATE-----
Note - In our video was pasted ssl.certificate_authorities: ["/etc/certs/elastic.evermight.net/ca.crt"]. This caused problems on Windows machines with Elastic Agents that ship data to the Fleet Server because Windows machines don't use Linux paths. By pasting the actual Certificate Authority data into the Advance YAML configuration fields, all Elastic Agents will have access to it upon connection to the Fleet Server. We explained this correction in a follow video called Fix Certificate Authority. Make sure the certificate details are indented properly for yaml syntax.
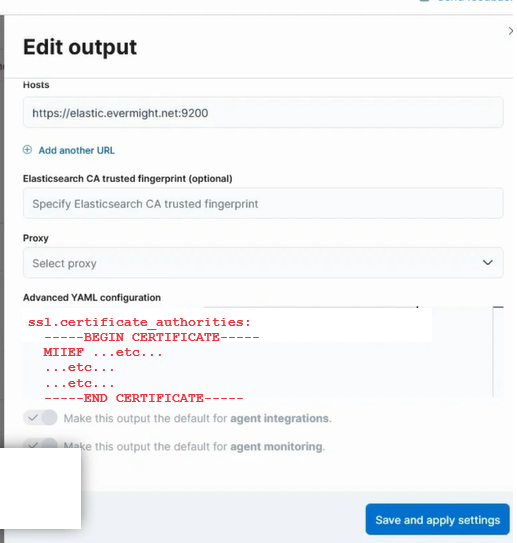
Press Save and apply settings.
Step 2 - Configure Fleet Server Host [04:36]
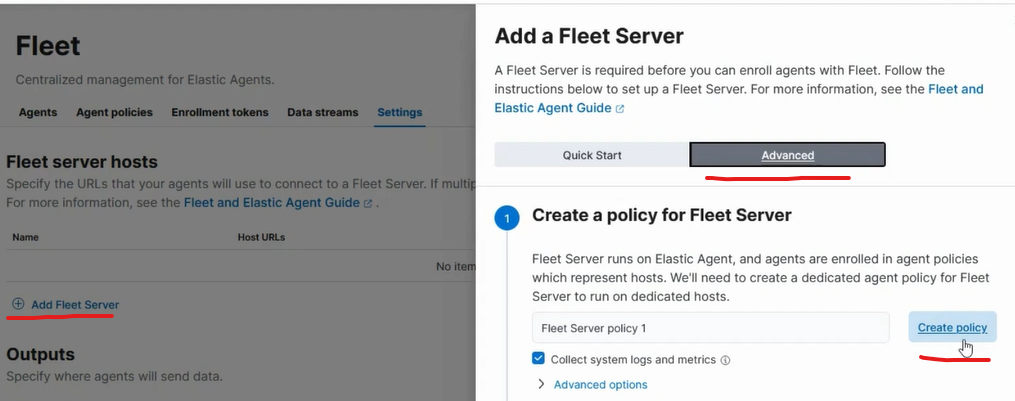
Press Add Fleet Server.
Press Advanced.
Press Create policy.
Go to Choose a deployment mode for security.
Choose Production.
Go to Add your Fleet Server host.
Enter fleet (or any other label) for Name and https://fleet.evermight.net:8220 for URL.
Press Add Host.
Press Generate Service Token.
Copy the code to install the Fleet Server:
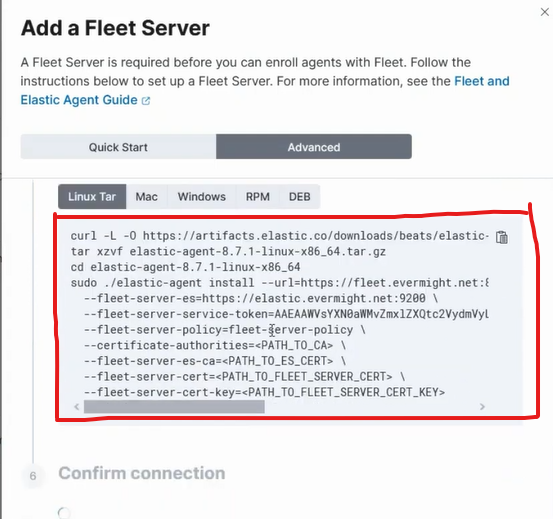
You will need to edit the install command, so paste it into a file and call the file something like install.sh.
Step 3 - SSL Certificates for fleet.evermight.net [06:42]
If you are using publicly signed certificates, copy your certicates for fleet.evermight.net to a location on your Fleet Server.
If you need to generate your own self-signed certificates, then you will copy the certificate authority on to your fleet server. Then go to elasticsearch.evermight.net and run this command:
/usr/share/elasticsearch/bin/elasticsearch-certutil cert \
  --out /root/fleet.zip \
  --name fleet \
  --ca-cert <path to your ca cert> \
  --ca-key <path to your ca key> \
  --dns fleet.evermight.net
  --pem
Copy the /root/fleet.zip file to your Fleet Server and unzip it.
Step 4 - Install Fleet Server [10:54]
Go back to your install.sh file from Step 2. Fill out the paths for --fleet-server-cert, --fleet-server-cert-key. And if you are using publicly signed certificates, then you can remove the flags --fleet-server-es-ca and --certificate-authorities. If you are using self-signed certificates, then you will need to keep these two flags.
Install the elastic agent for the fleet server with ./install.sh and answer Yes when prompted about installation.
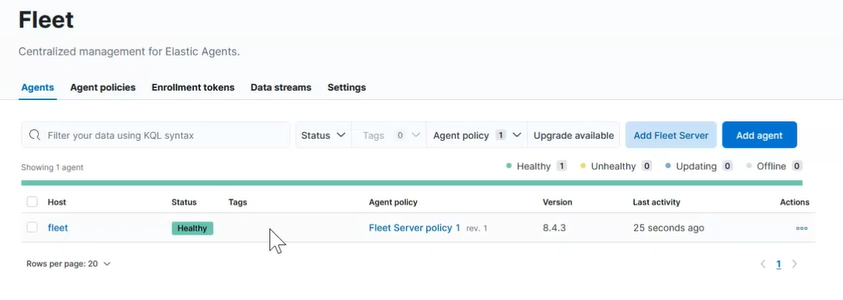
Go back to Kibana and go to Fleet > Agents.
Confirm you see a healthy Fleet Server.
Step 5 - Install Nginx and Elastic Agent [12:40]
Install Nginx
Go to the Ubuntu server you want to install Nginx on. Then run this command:
apt-get install -y nginx
Visit https://<ip or domain> to confirm Nginx is up and running.
Install Elastic Agent
Go to Kibana, then go to Menu > Integrations and search for Nginx.
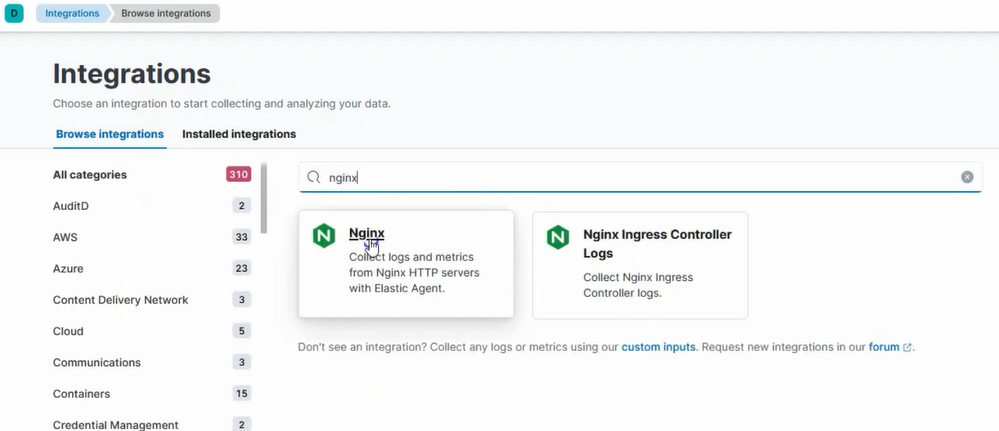
Press Nginx.
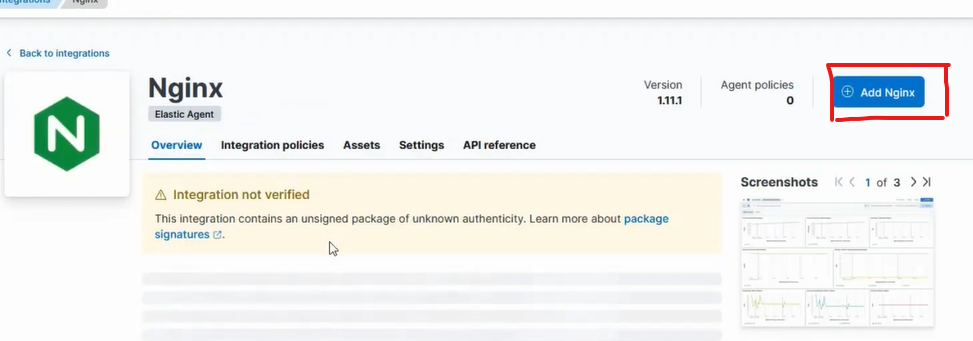
Press Add Nginx.
Scroll down to Where to add this integration?.
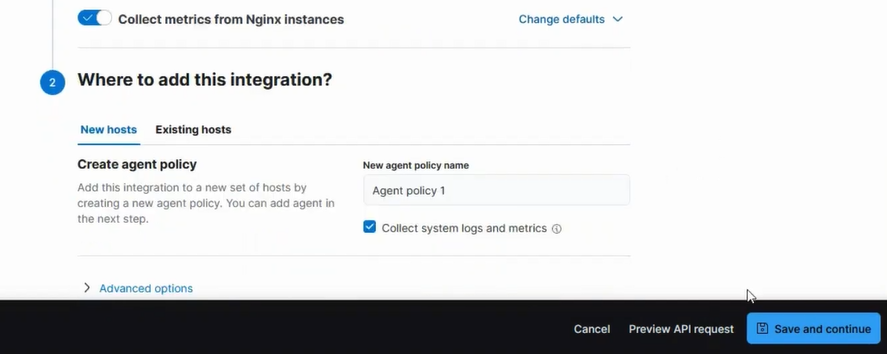
Choose New hosts.
Press Save and continue.
In the popup, press Save and deploy changes.

Press Add agent.
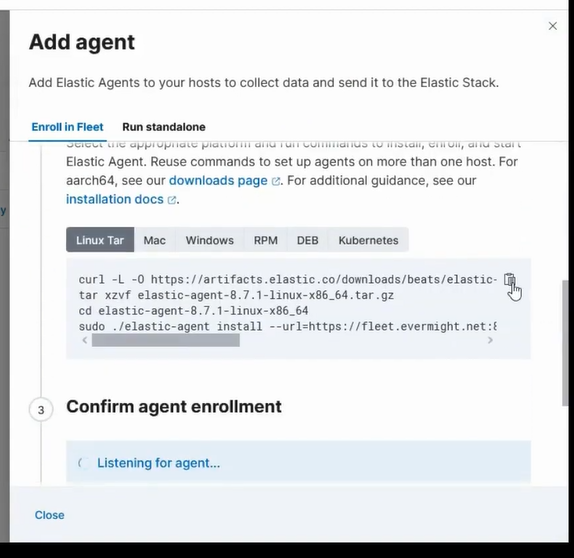
Copy the commands above for installing an elastic agent and paste it into a new file on your Nginx server. We call the new file ./install-agent.sh.
If you are using self-signed certificates, copy over the Certificate Authority files to your nginx server. Then add the flag --certificate-authorities=<path to ca> (and if you have issues, try including the --fleet-server-es-ca=<path to ca> as well). If you are using publicly signed certs, then ignore this flags.
Run the ./install-agent.sh to install the Elastic agent and answer Yes when prompted about installation.
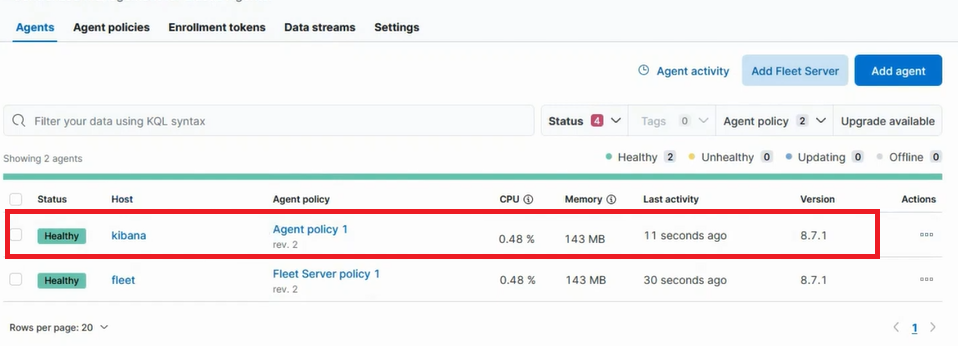
Confirm success under Fleet > Agents.
Debugging
If you run into issues, you can find logs for elastic agent in:
Linux: /opt/Elastic/Agent/data/elastic-agent-<id>/logs.
Windows: C:\Program Files\Elastic\Agent\data\elastic-agent-*\logs\
