Introduction
Code on Github:
We will setup Elasticsearch, Kibana, beats, and Logstash with Docker Compose.
This video assumes you already have knowledge of setting up Elaticesearch, Kibana, Beats, Logstash, Elastic Agent, APM, and Fleet Server without using a Container. If not then you can go here setup. And you should understand Elastic Agent, Fleet Server and APM TBD.
Requirements
- A new instance of Linux machine like Ubuntu 20.04 to act as the Server
- Docker and Docker-Compose Installed
- Docker containers from previous Docker + ELK video
Demonstration [02:28]
Make a new directory for this part 2
mkdir ../es
cd ../es
Initialize a new git repository.
git init;
git remote add origin https://github.com/evermight/elastic-stack-docker-part-two.git;
git fetch -a;
git checkout main
List out all files in the directory.
ls -alh
Build with the below docker compose command.
docker-compose up --build -d
Get the IP address of your server for it will be used as the url to the docker containers.
ip a
Visit Kibana page with http://<YOUR IP ADDRESS>:5601.
Then login with the elastic username and password present at the .env file
username: elastic
password: changeme
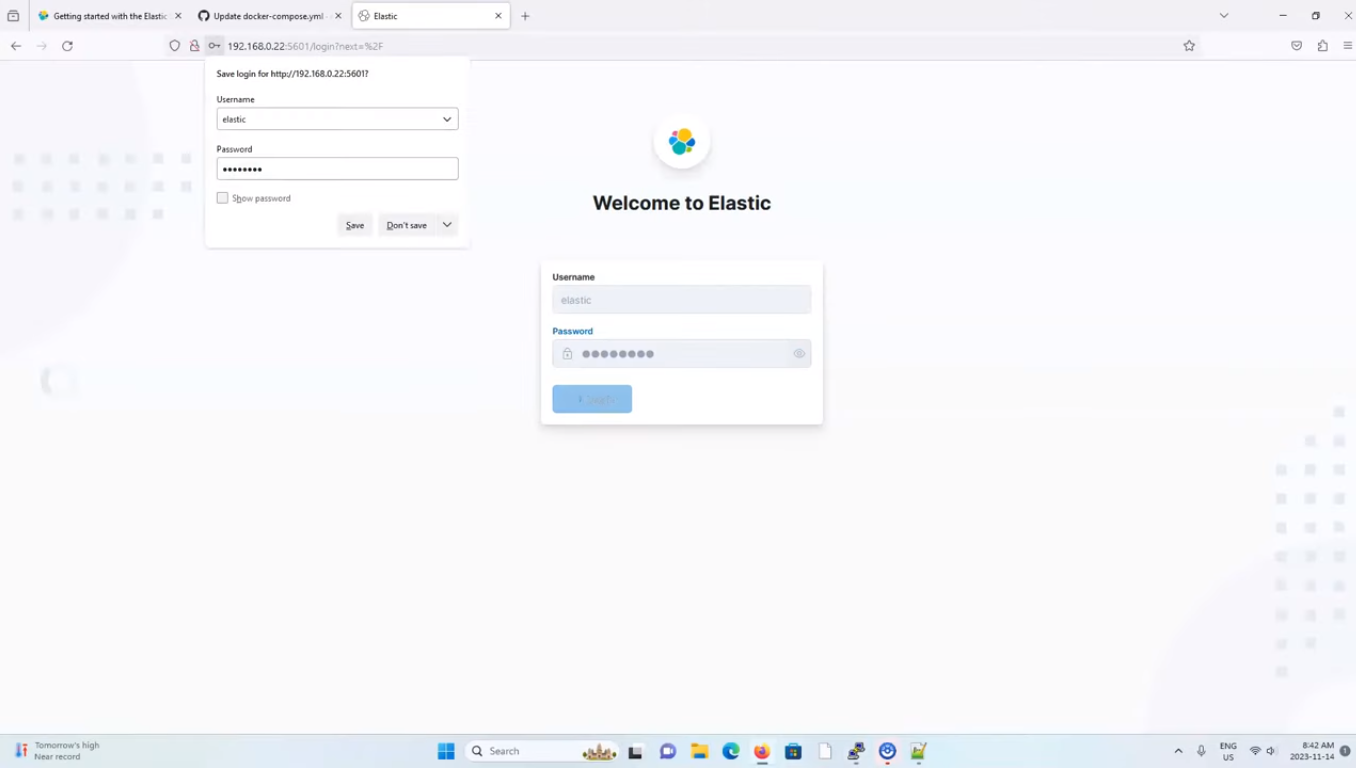 Kibana Login page
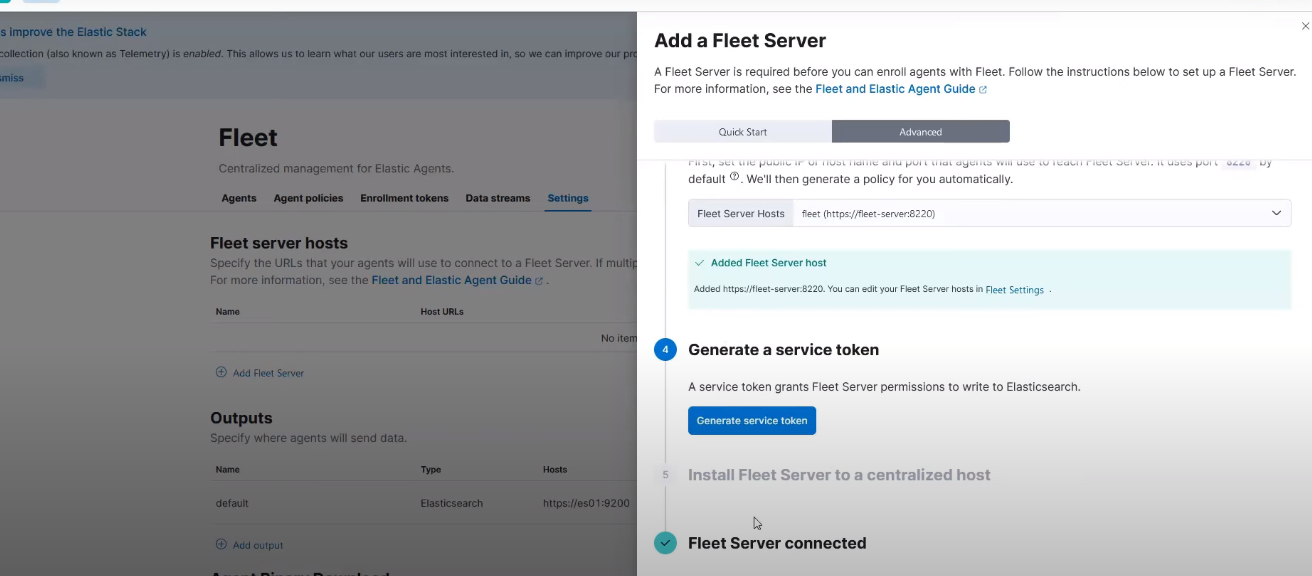
Go to Fleet > Settings.
Run the ./get-cert-details.sh to determine your CA finger print and your CA.
Populate the information as shown in this screenshot:
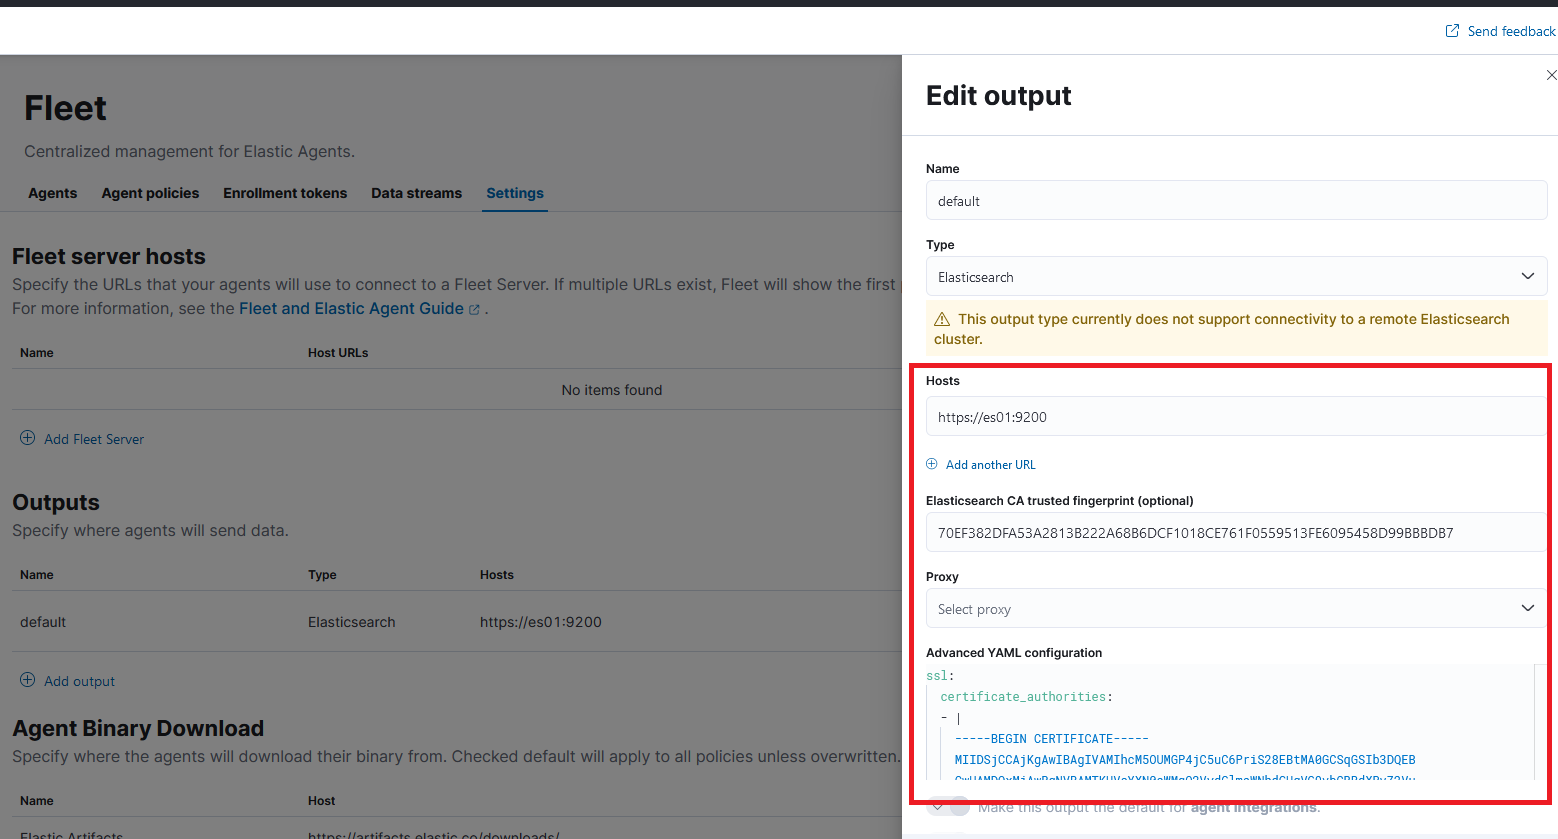 Fleet Server changes
then click on Save and apply settings, and then proceed to click on Save and deploy. Now go back to the Fleet > Agent and refresh the tab. You should see something similar to the image below, which indicates that Elastic Agent, AM and Fleet Server are up abd running.
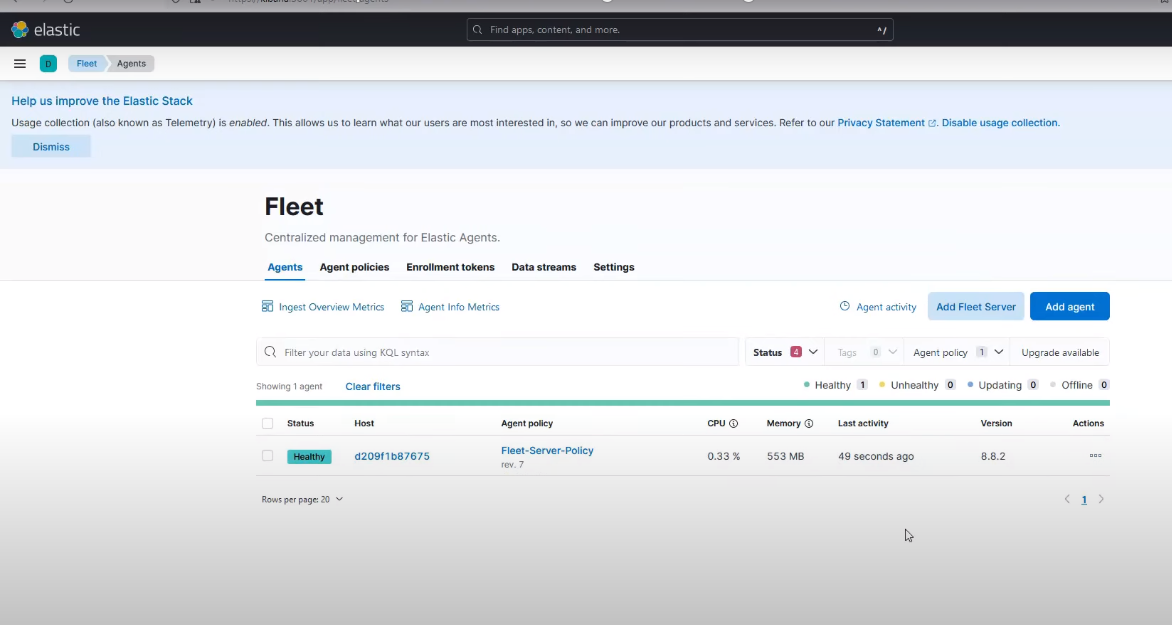 Elastic Agent, APM, and Fleet Server Running Success
Update the machine and install some software with the below command:
apt-get updat && apt-get install -y vim curl gnupg gpg;
Install Apache2 with the below command:
apt-get install -y apache2;
Adding integrations
On Kibana, go to Integrations > Browse Integrations, and search for apache, and click the result as shown in the screenshot below:
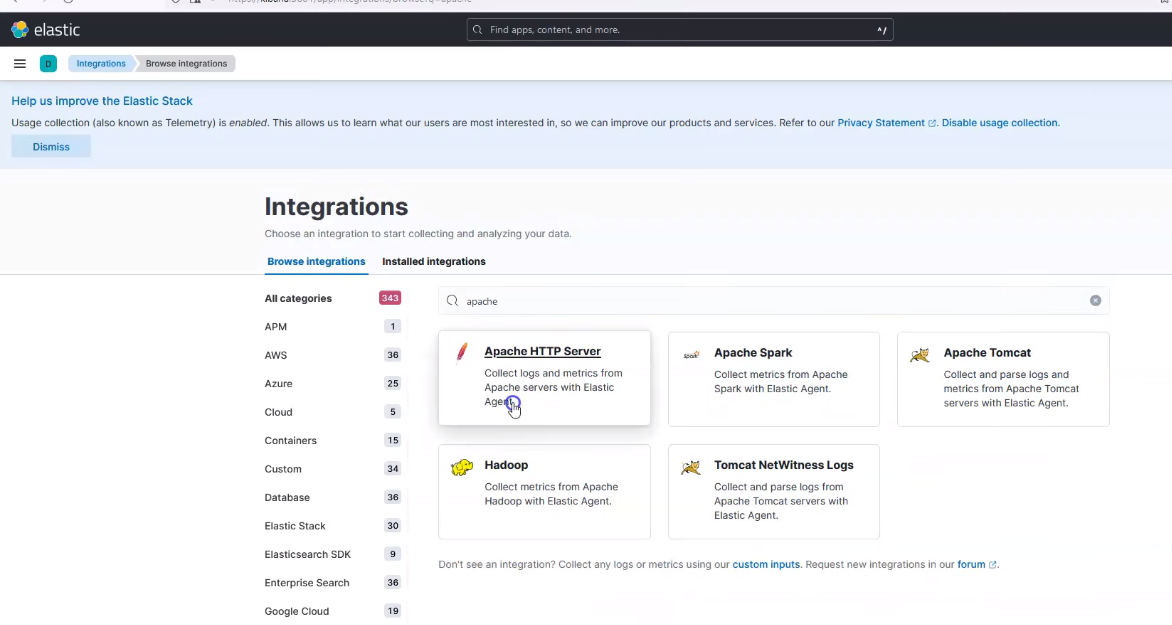 Apache Search
Click on Add Apache HTTP Server by the top right corner.
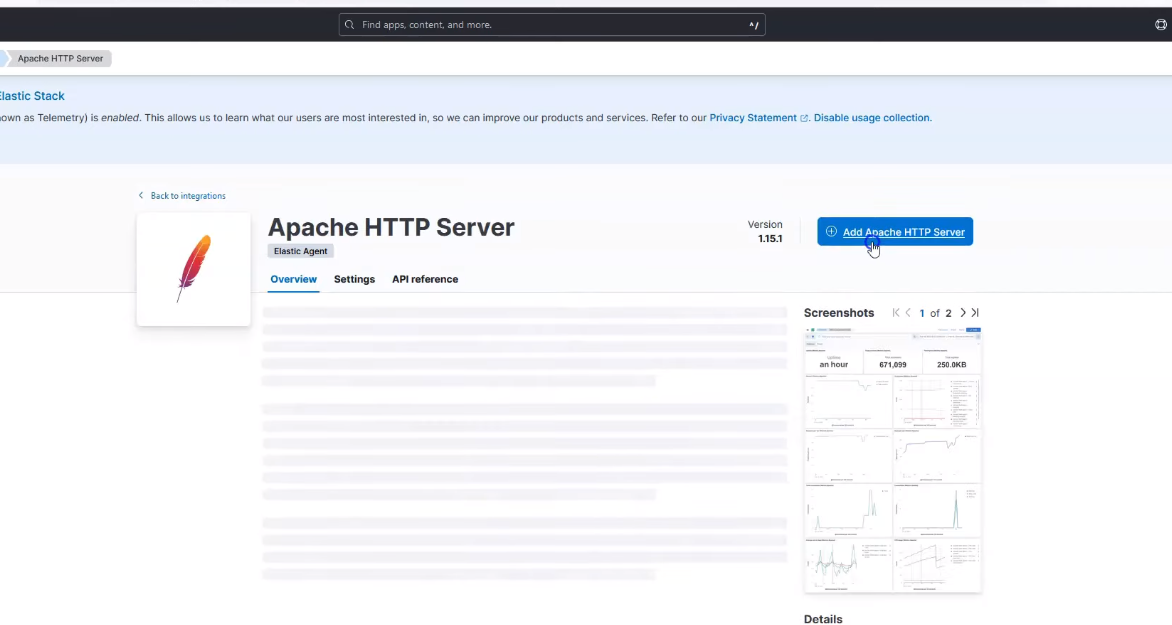 Add Apache
Then click on save and continue, then select Add Elastic Agent to your hosts.
And to let it be managed by the fleet server, click on fleet settings as shown in the screenshot below;
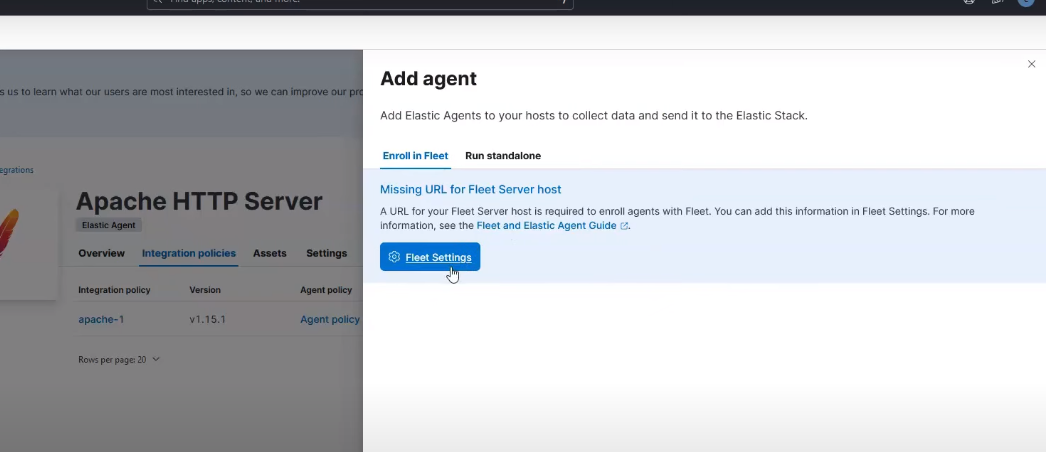 Fleet Settings
Then click on Add Fleet Server as shown in the sceenshot below;
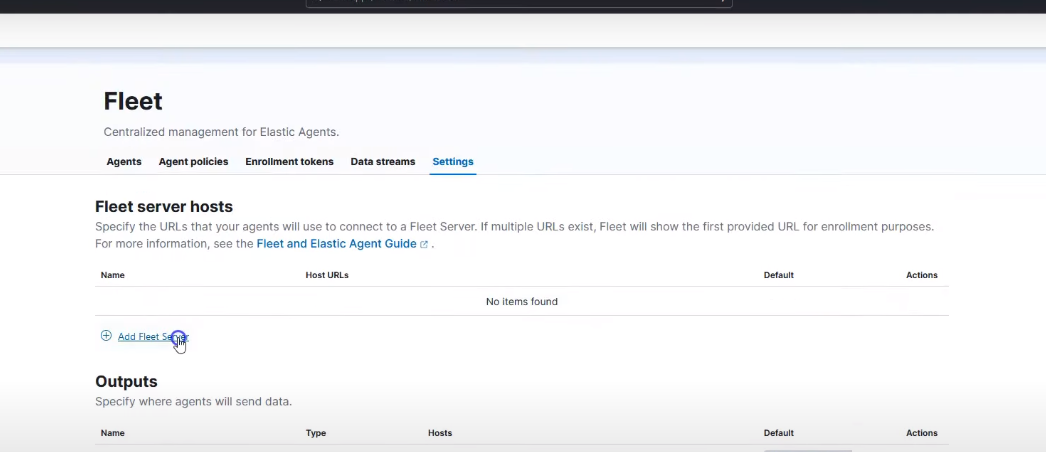 Fleet Settings
Go to advanced, and for the Choose a deployment mode for security select production.
For the Add your Fleet Server host, in the name section, type in fleet, and in the url section, it should be the docker service name, like https://fleet-server:8220.
Then click on Add host.
You should get a connection success like the screenshot below;
 Fleet Host Success
Add agent for Fleet server
Go to Fleet > Agent Policies, and click on the triple dots, and once done, click on Add agent
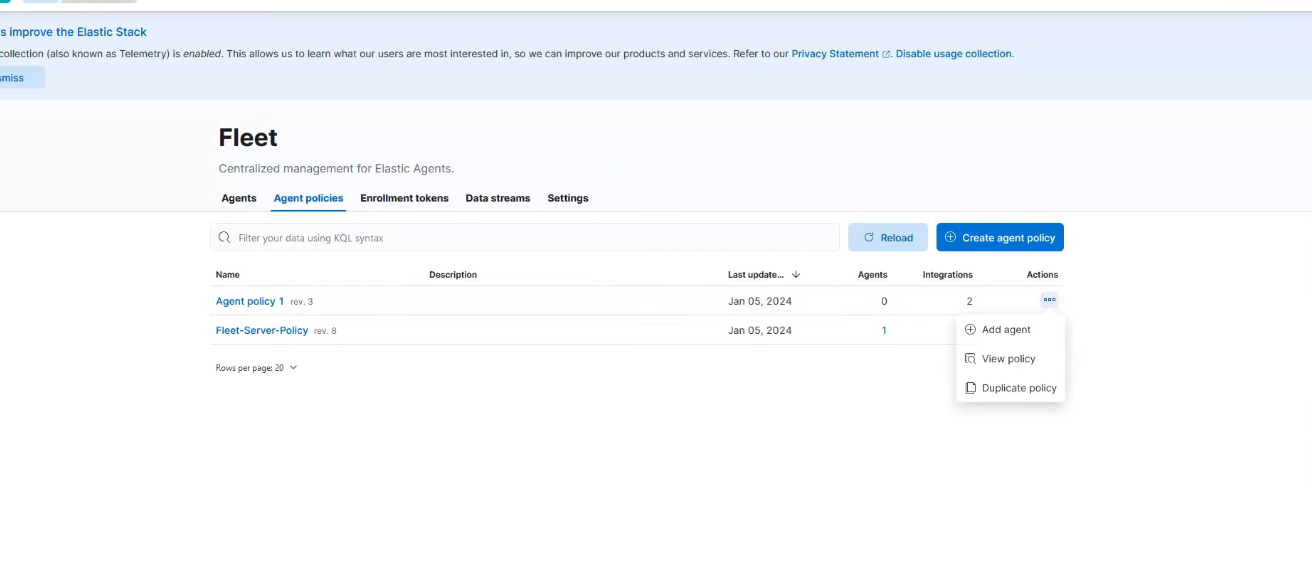 Add Fleet Agent
Scroll down to Install Elastic Agent on Your Host, and copy the command;
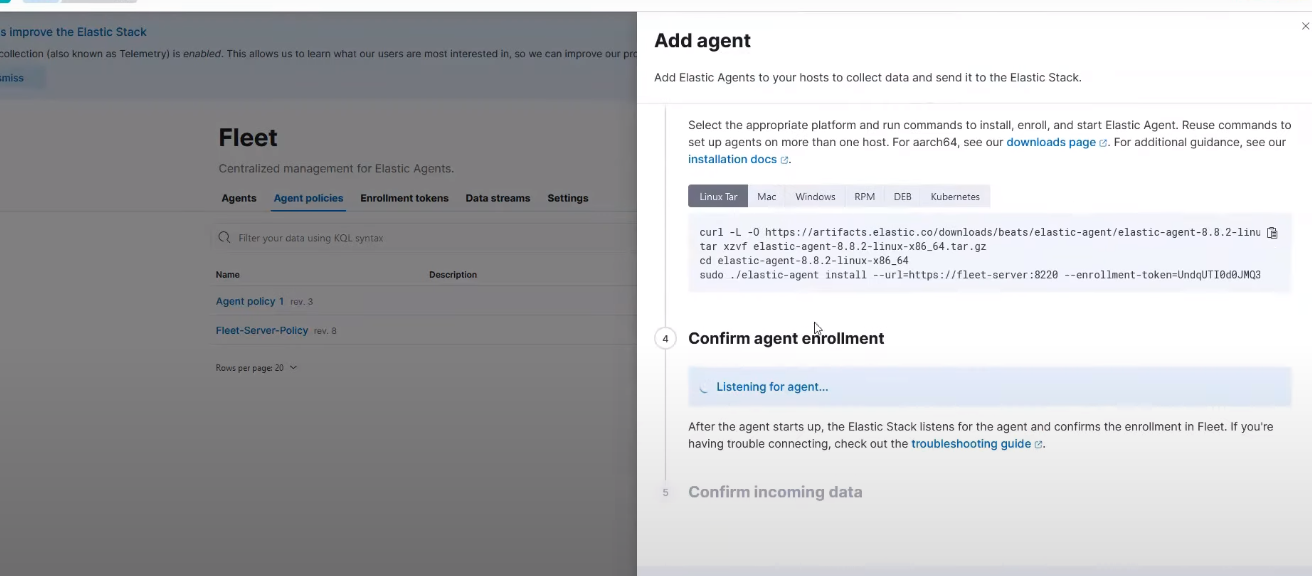 Install Elatic Agent
Open a install.sh file on your terminal with
vi install.sh
and paste the command you copied. And add the below line to the last line in the file and save:
--certificate-authorities=/root/ca.crt
Then run the below line in your termninal
chmod +x install.sh
Open a ca.crt file with
vi ca.crt
paste the certificate details that was generated from previous get-cert-details.sh run:
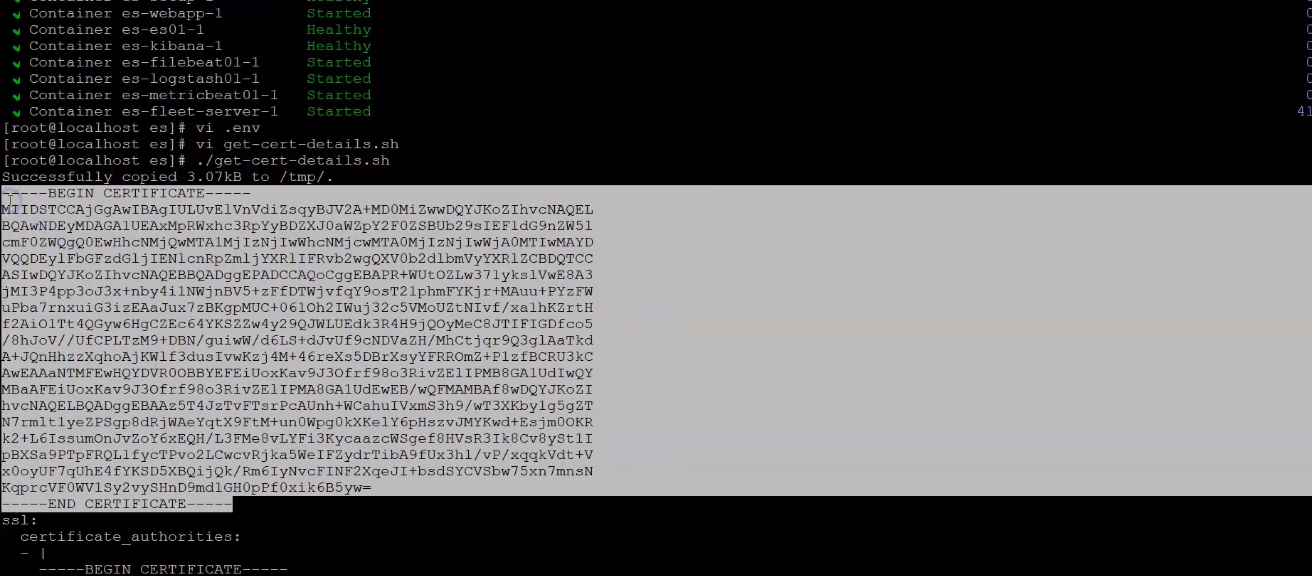 Install Elatic Agent
Now open your hosts file, and map the ip address with the hostname;
vi /etc/hosts
and do as shown in the screenshot, while making sure you use the correct IP Address;
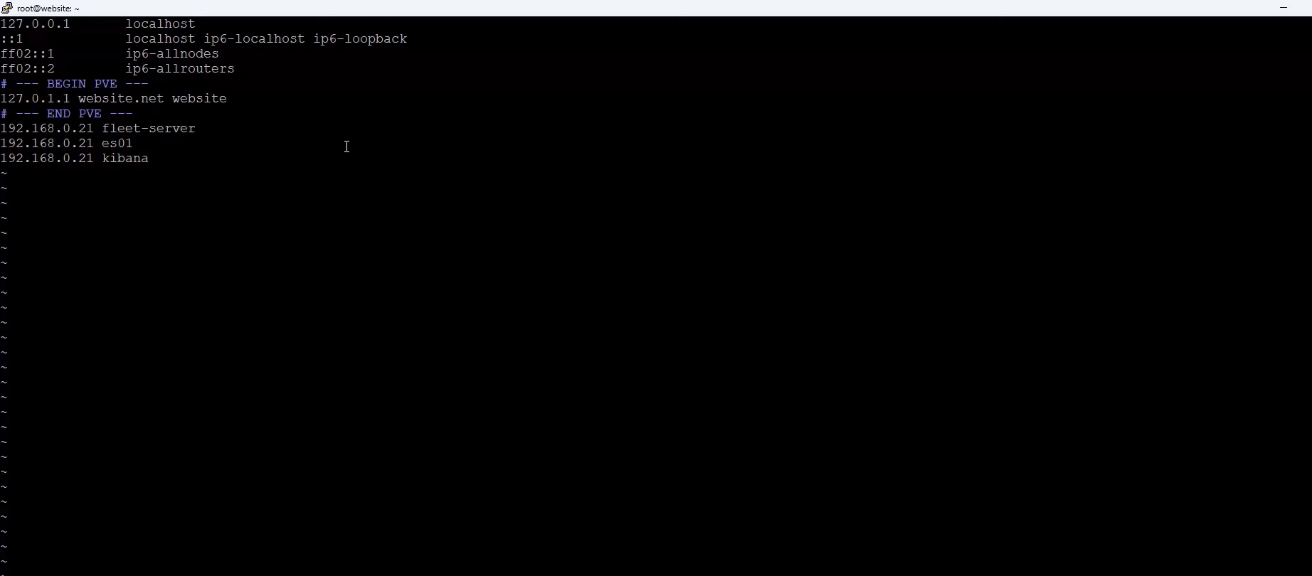 Edit Hosts File
Then run the install script -
./install.sh