
Introduction
Code on Github: Elasticsearch and Application Performance Monitoring
We will setup Application Performance Monitoring with Elasticsearch and Kibana. If you do not have APM, Elasticsearch and Kibana set up yet, then follow these instructions for Part 1, This for Part 2 and This for Part 3.
This video assumes you are using Publicly Signed Certificates. If you are using Self Signed Certificates, go here TBD.
Requirements
- A running instance of Elasticsearch and Kibana.
- A new instance of Ubuntu 20.04 to act as the Fleet Server
Step 1 - Use index connector to publish alerts to an index in elsticsearch [00:40]
Create an Index [02:24]
Login to kibana, and go to Dev Tools > Console, and run the below command to create an index:
PUT /kibanalert
and you should see an output similar to the below
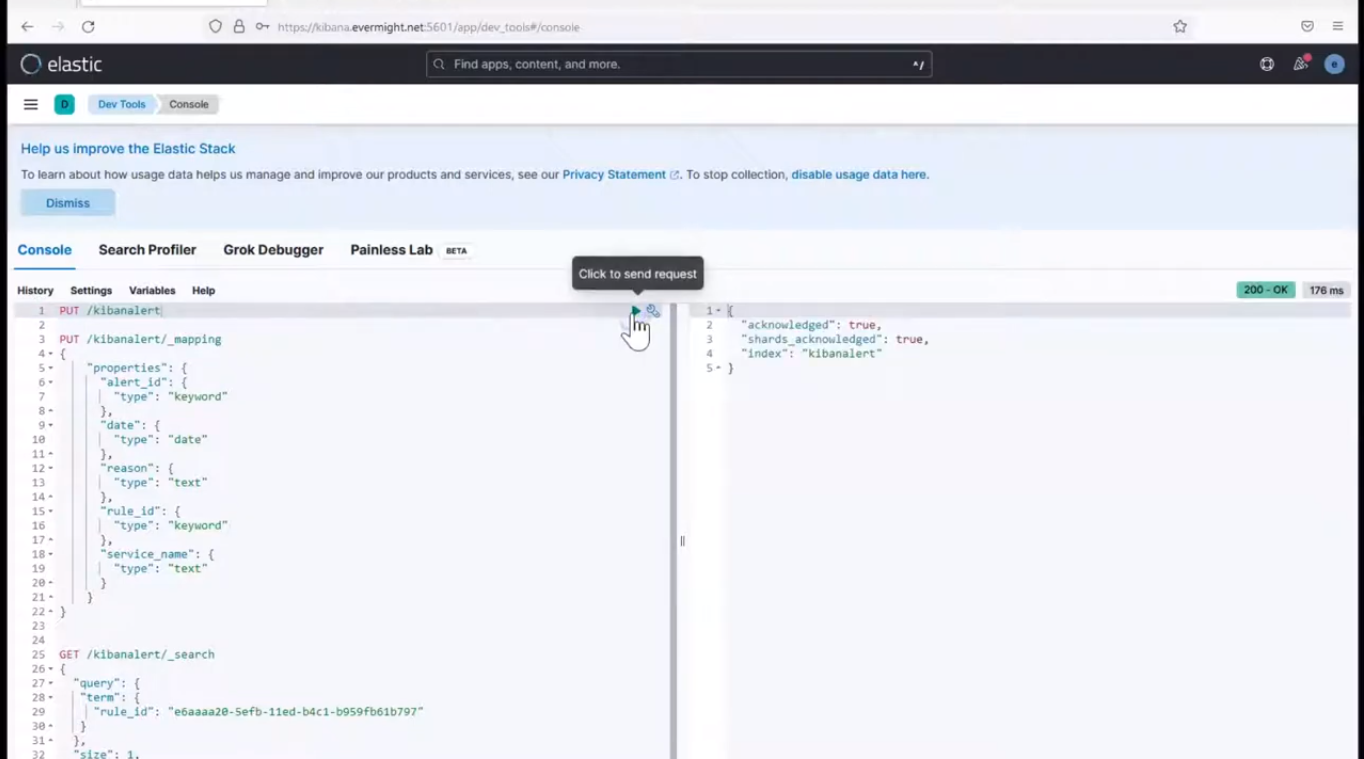 Create Index
Run the below command to create the mapping.
PUT /kibanalert/_mapping
{
    "properties": {
        "alert_id": {
            "type": "keyword"
        },
        "date": {
            "type": "date"
        },
        "reason": {
            "type": "text"
        },
        "rule_id": {
            "type": "keyword"
        },
        "service_name": {
            "type": "text"
        }
    }
}
and you should see an output similar to the below
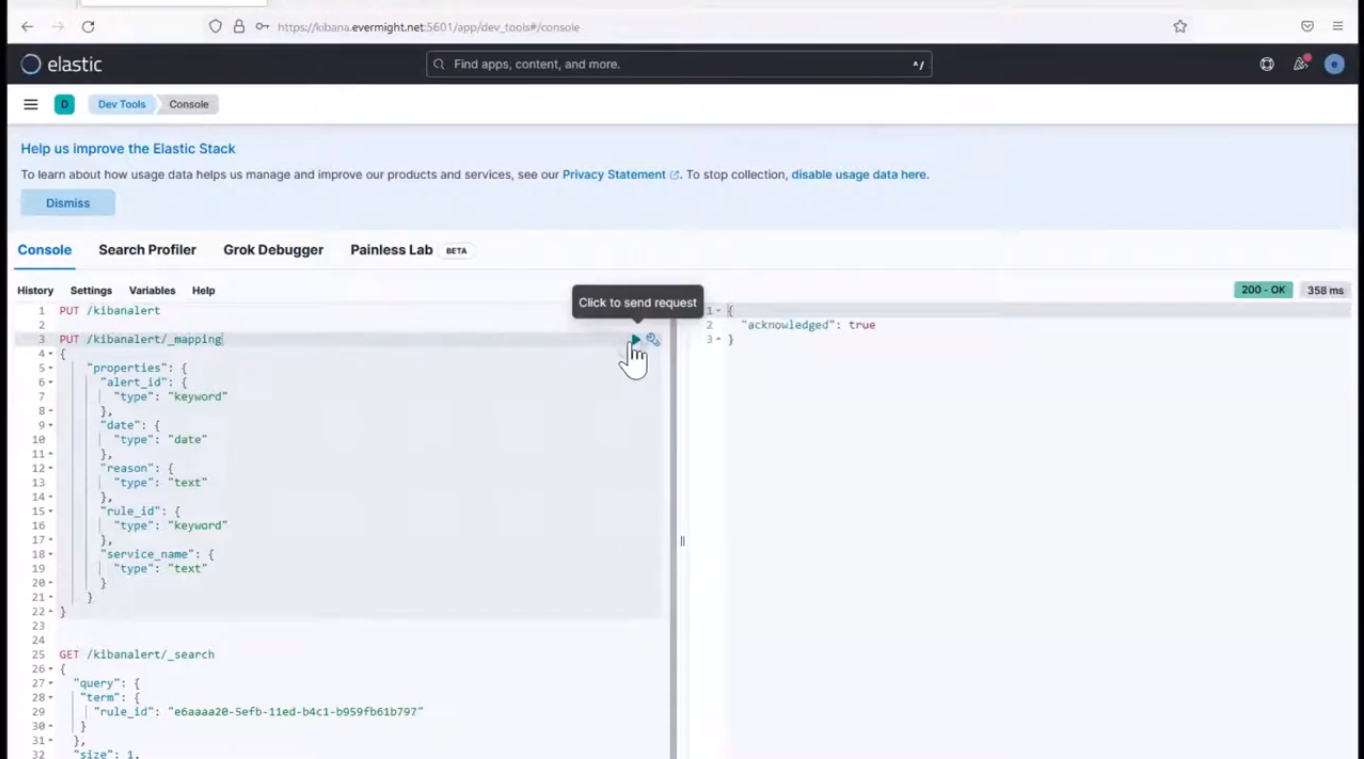 Add Index Mapping
and when you do a search on the mapping, you will see that there are mappings.
GET /kibanalert/_mapping
and you should see an output similar to the below
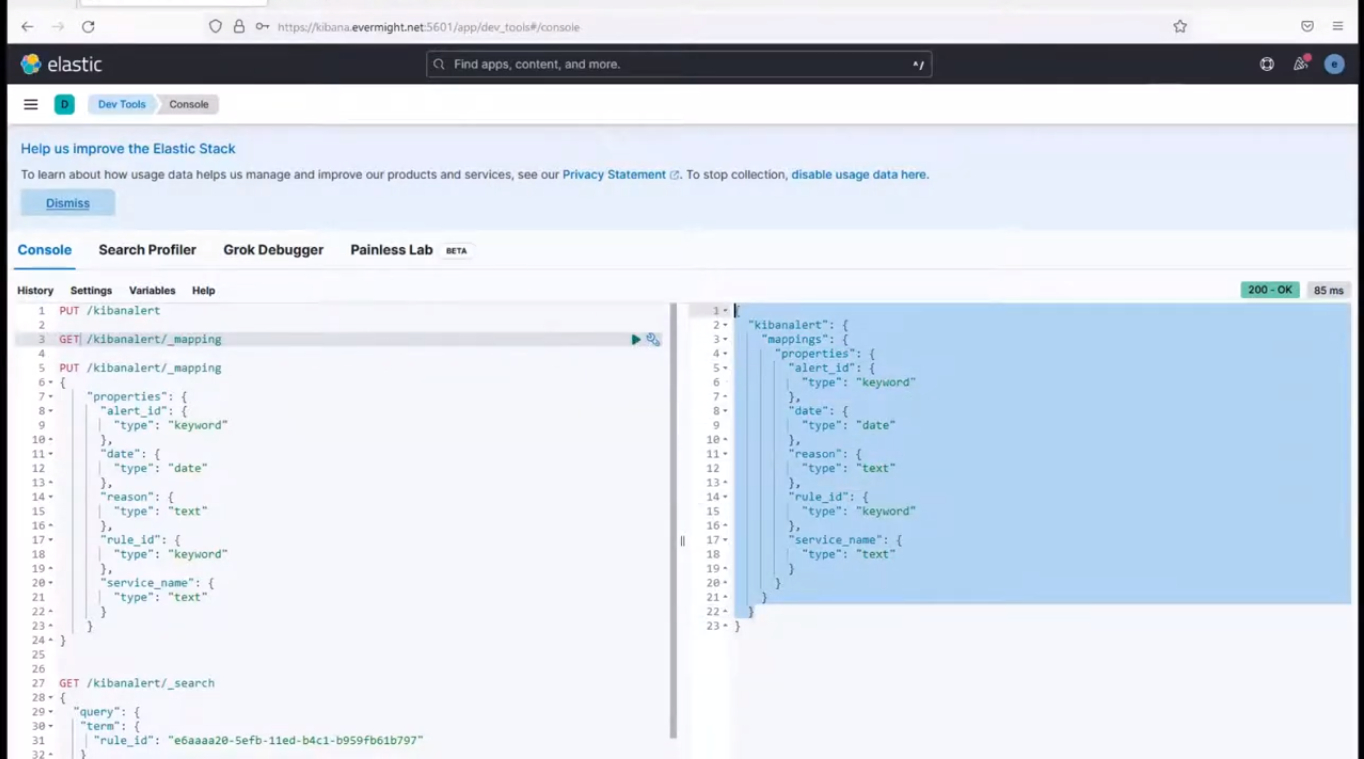 Index Mapping Result
Step 2 - Publish Error Count logs to index [06:20]
Go to Observability > Alerts > manager rules, and click on the pen icon on the Error count alert we set up in the 2nd video.
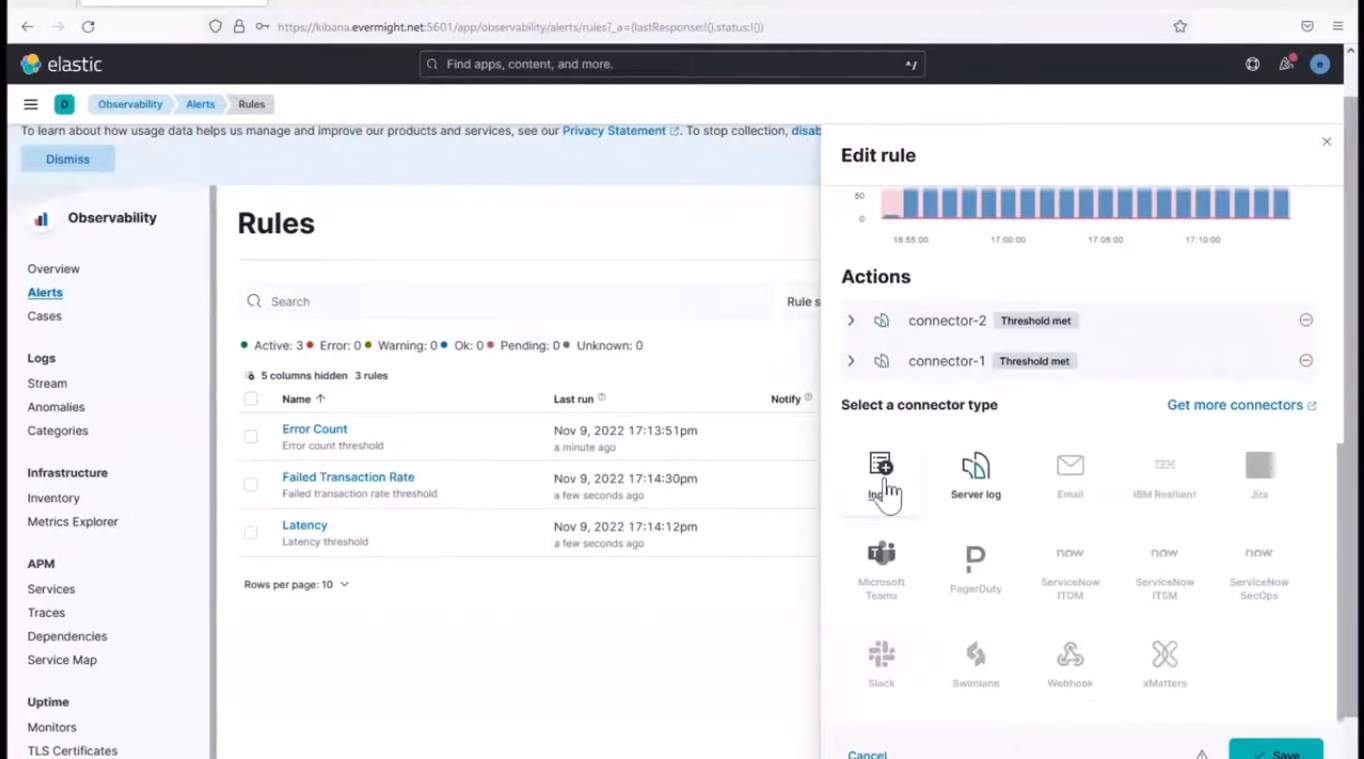 Index Connector
click on Index connector, and fill in the details as shown below:
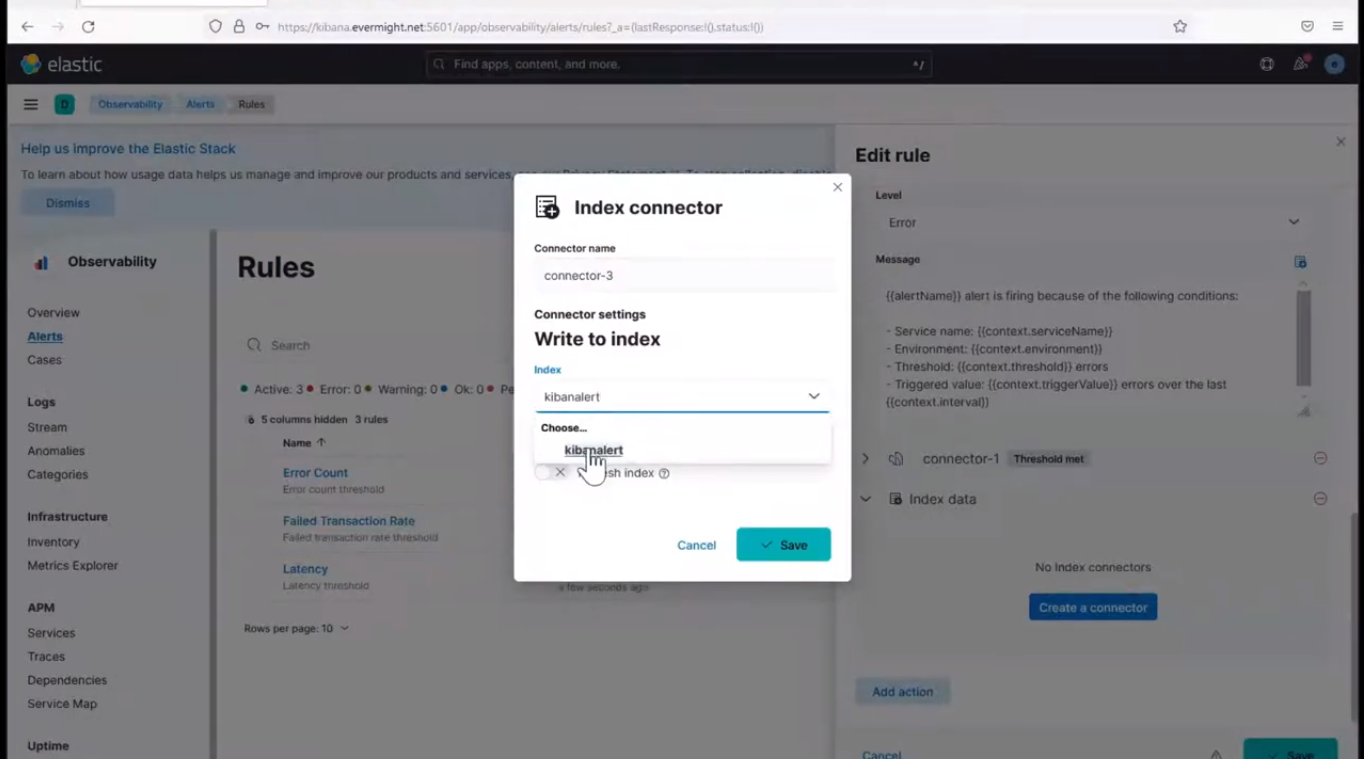 Create Index Connector
and add a timefield of date, and then press save. Paste the below in the Document to index field
{
    "alert_id": "{{alert.id}}",
    "rule_id": "{{rule.id}}",
    "reason": "{{context.reason}}",
    "service_name": "{{context.serviceName}}",
    "date": "{{date}}"
}
It should look similar to the image shown below:
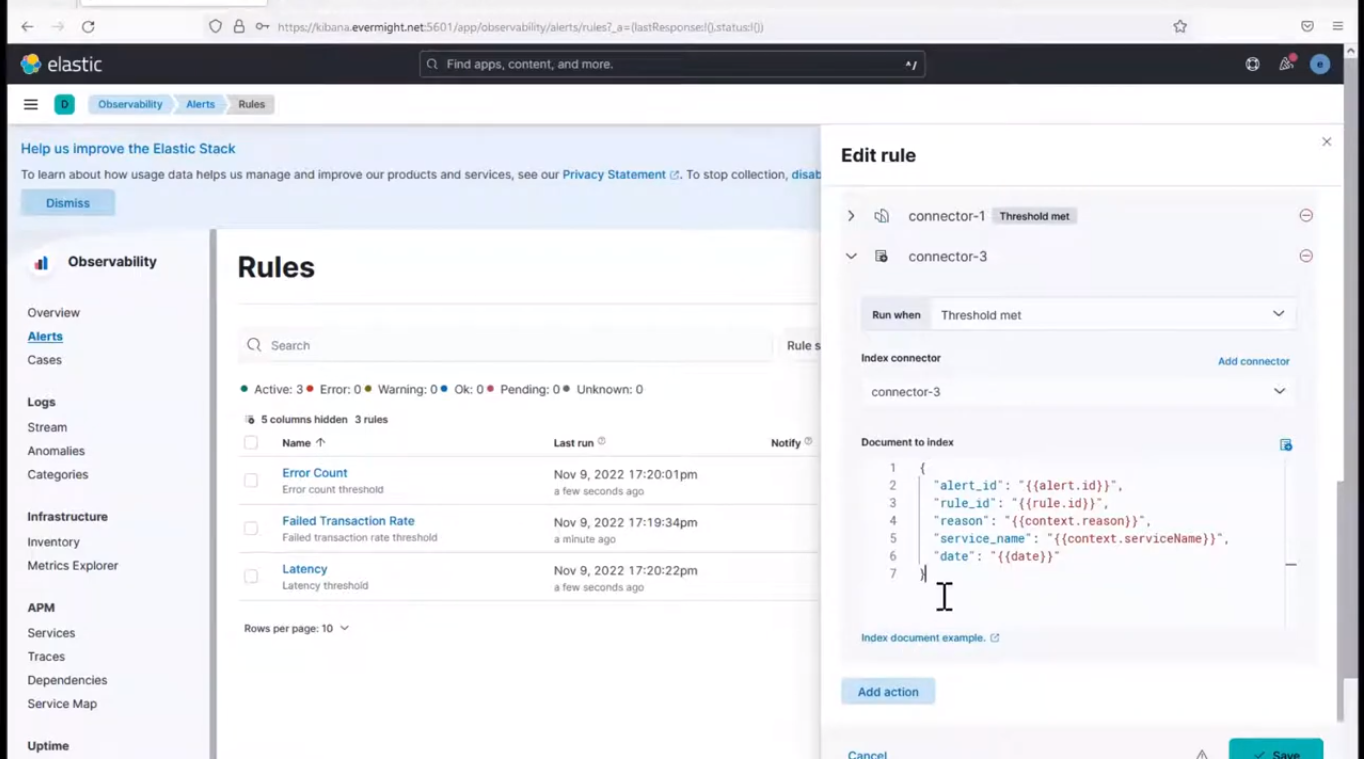 Edit Index Connector
Now click on save at the bottom right corner to save the connection details.
To view the logs been published, go to Dev Tools > Console, and run the below command.
GET /kibanalert/_search
you should see something similar to the image below which shows the doc count present in the index:
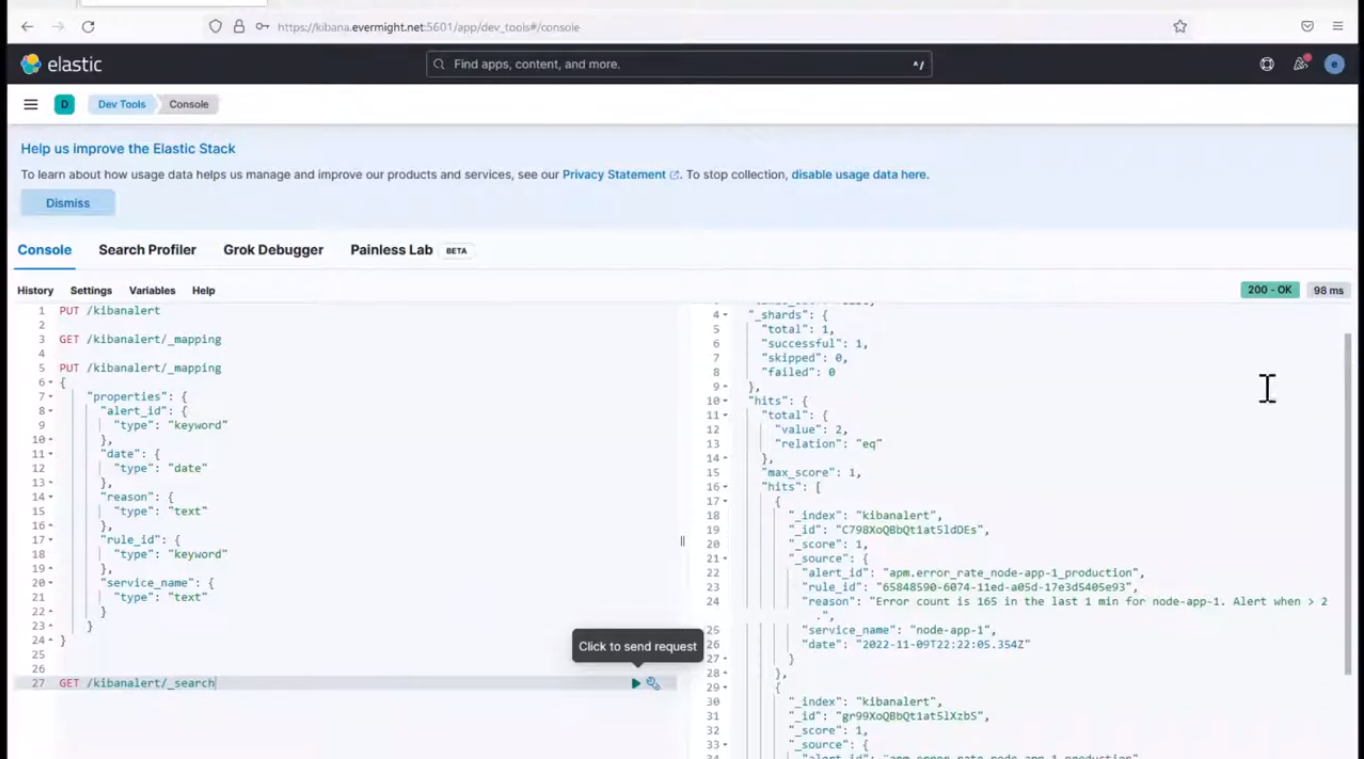 View Index data
Step 3 - Publish Failed Transaction Rate logs to index [14:50]
Go to Observability > Alerts > manager rules, and click on the pen icon on the Failed Transaction Rate alert we set up in the 2nd video. click on Index connector.
Index Connector
and use the connector-3 connector we created before. Paste the below in the Document to index field
{
    "alert_id": "{{alert.id}}",
    "rule_id": "{{rule.id}}",
    "reason": "{{context.reason}}",
    "service_name": "{{context.serviceName}}",
    "date": "{{date}}"
}
It should look similar to the image shown below:
Edit Index Connector
Now click on save at the bottom right corner to save the connection details.
Step 4 - Publish Latency logs to index [10:00]
Go to Observability > Alerts > manager rules, and click on the pen icon on the Failed Transaction Rate alert we set up in the 2nd video. click on Index connector.
Index Connector
and use the connector-3 connector we created before. Paste the below in the Document to index field
{
    "alert_id": "{{alert.id}}",
    "rule_id": "{{rule.id}}",
    "reason": "{{context.reason}}",
    "service_name": "{{context.serviceName}}",
    "date": "{{date}}"
}
It should look similar to the image shown below:
Edit Index Connector
Now click on save at the bottom right corner to save the connection details. To view the logs been published, go to Dev Tools > Console, and run the below command.
GET /kibanalert/_search
you should see something similar to the image below which shows the doc count present in the index:
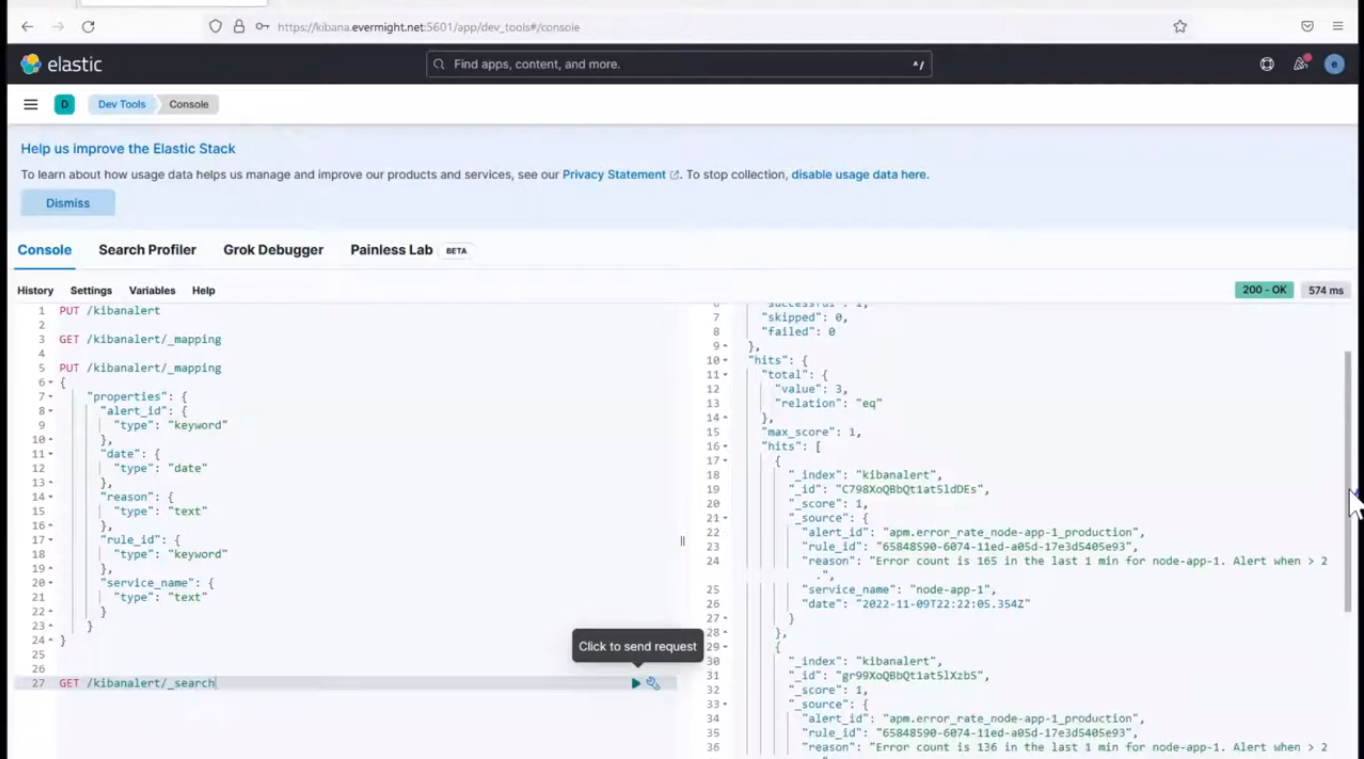 View Index data
Step 5 - Run kibanalert on terminal [11:40]
You will find the source code for the apps in this repo. Clone this repo from your terminal:
git clone https://github.com/evermight/kibanalert.git
Create an alert user on Kibana. Go to Stack Management > Users > Create, and create a user using the following details:
Username: alert-reader
Full name: auditbeat-publisher
Email address: anything@anything.com
Password: anything
Roles: viewer
go to Dev Tools > Console. Then run this command:
POST /_security/api_key/grant
{
  "grant_type": "password",
  "username": "alert-reader",
  "password": "anything",
  "api_key": {
    "name": "alert-reader-key"
  }
}
This should produce a result like:
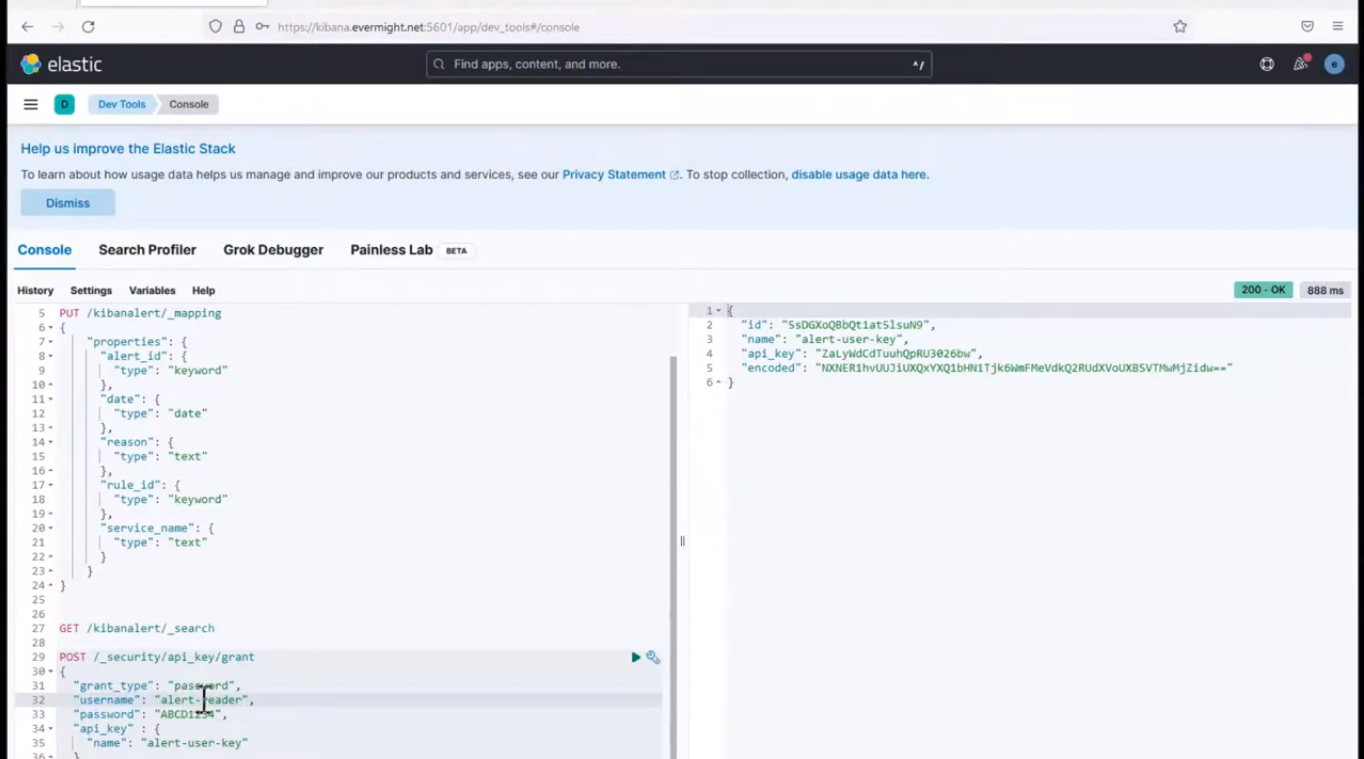 API Key for alert-reader